How to Get Rid of Mildew Smell for Good
That musty, earthy smell is more than just annoying—it’s a warning sign. Before you can ever hope to get rid of it, you have to play detective and track down the source of the moisture that’s feeding the problem.
The key is to eliminate the dampness, not just clean the spot you can see. A thorough cleaning with something like vinegar or baking soda is crucial, but it's only half the battle. You have to make sure the area is bone-dry and gets plenty of air afterward to stop the cycle for good.
Finding Where That Musty Odor Is Hiding
That lingering smell is an alarm bell telling you there's a moisture problem somewhere in your home. The source might be obvious, like a forgotten pile of wet towels, or it could be something much sneakier, like a slow drip behind a wall.
Trying to ignore the smell is like hitting snooze on that alarm. The problem won't go away on its own; in fact, it will likely get worse. You've got to trust your nose and follow the scent to where it’s strongest. This initial hunt is the single most important step. If you just clean a surface without fixing the leak or dampness, you’re only putting a temporary bandage on a problem that will definitely be back.
Your Home Inspection Checklist
Start your search by methodically checking the usual suspects. These are the spots notorious for trapping moisture and creating the perfect dark, damp environment that mildew loves.
Your inspection should use all your senses. Follow the smell, but also look for visual clues and physically feel for any damp spots.
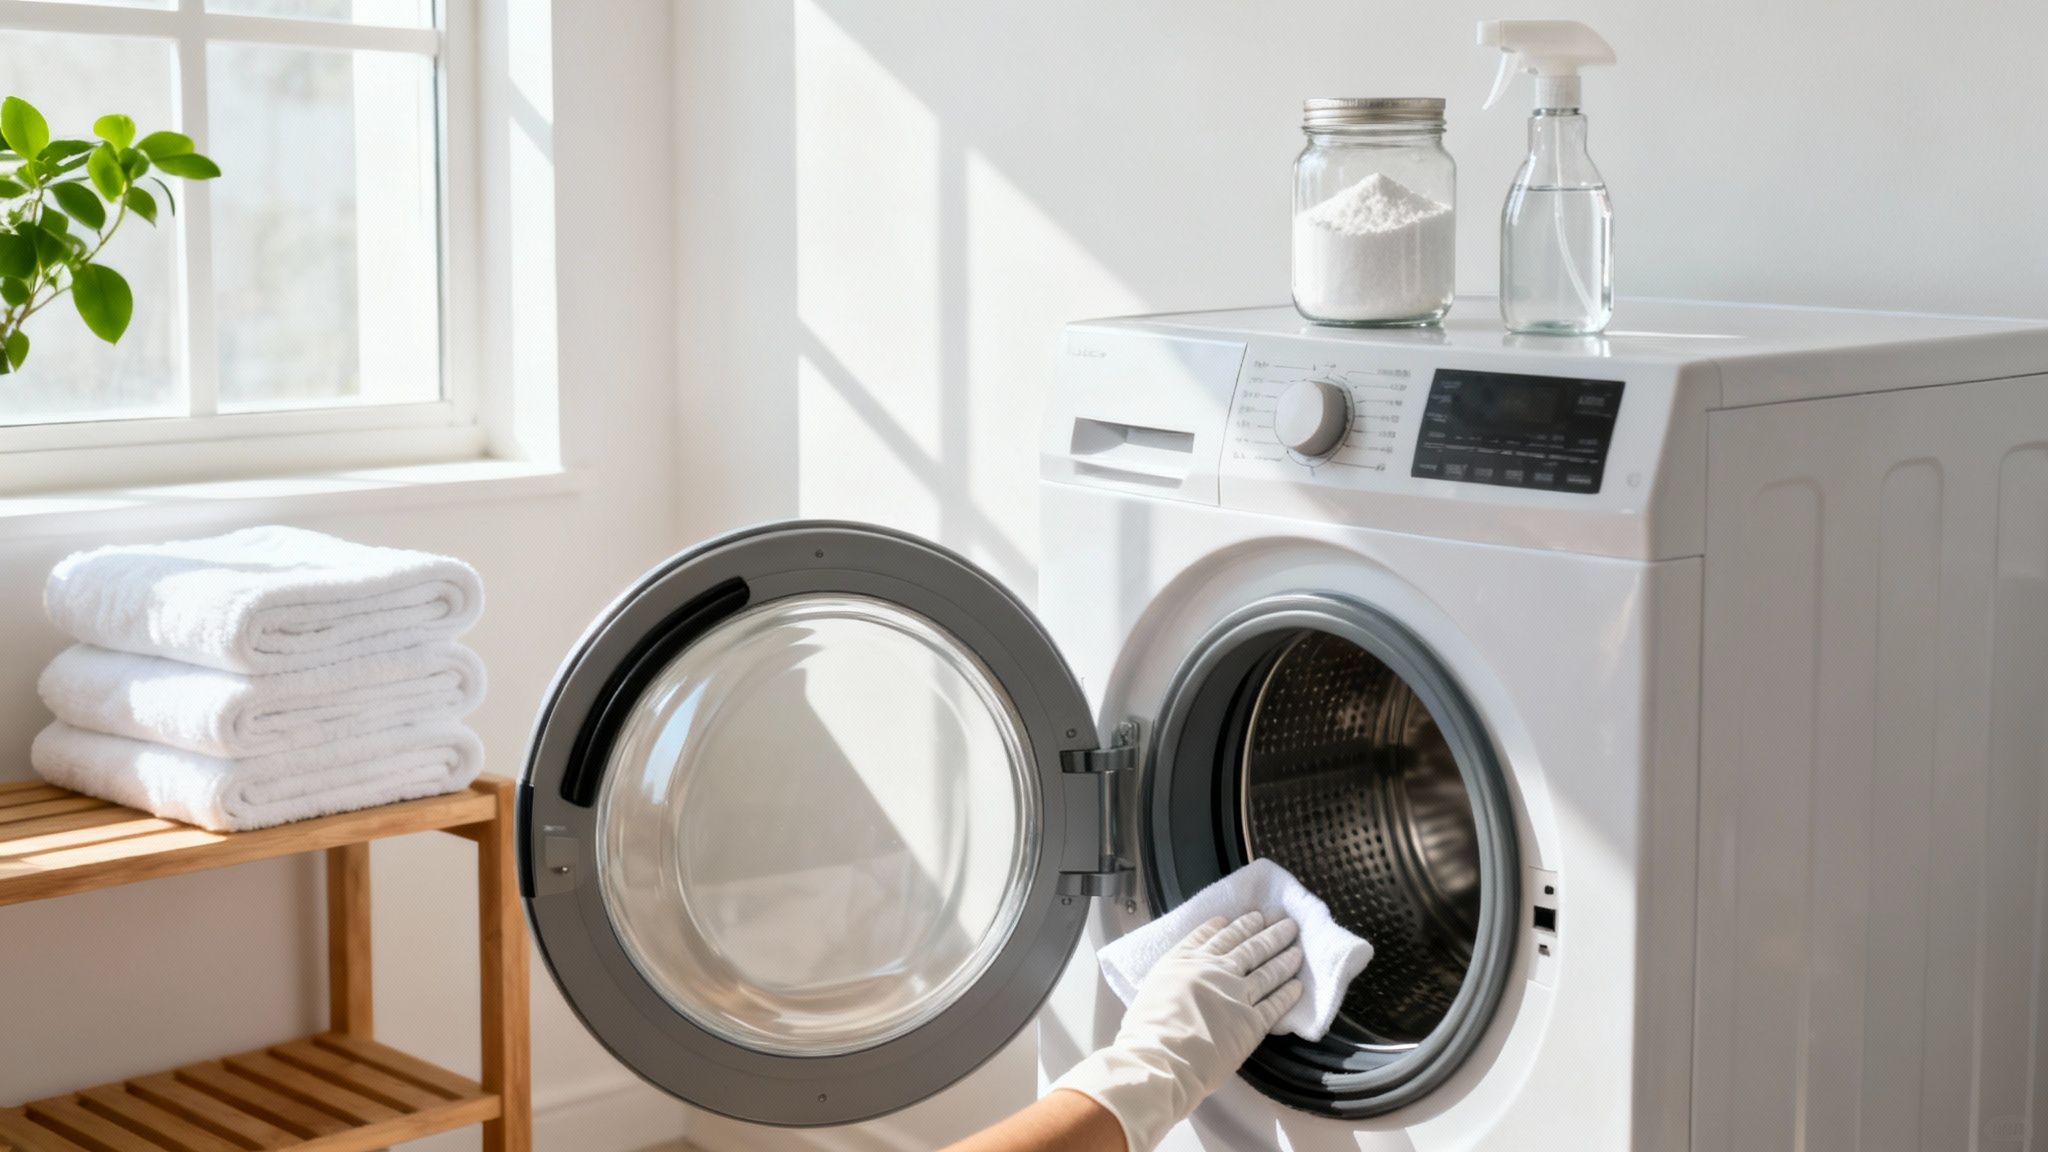
- Laundry Room: Pop your head inside the washing machine. Pay close attention to the rubber gasket on front-loading models, as it's a prime spot for gunk. Check around and behind the unit for leaks. Don't forget the laundry hamper itself—synthetic workout clothes, in particular, can start to smell funky fast.
- Bathrooms: Get down and look under the sink for any tell-tale drips. Scan the grout and caulk lines in your shower for any dark or discolored patches. And make sure your exhaust fan is actually doing its job and pulling steam out of the room.
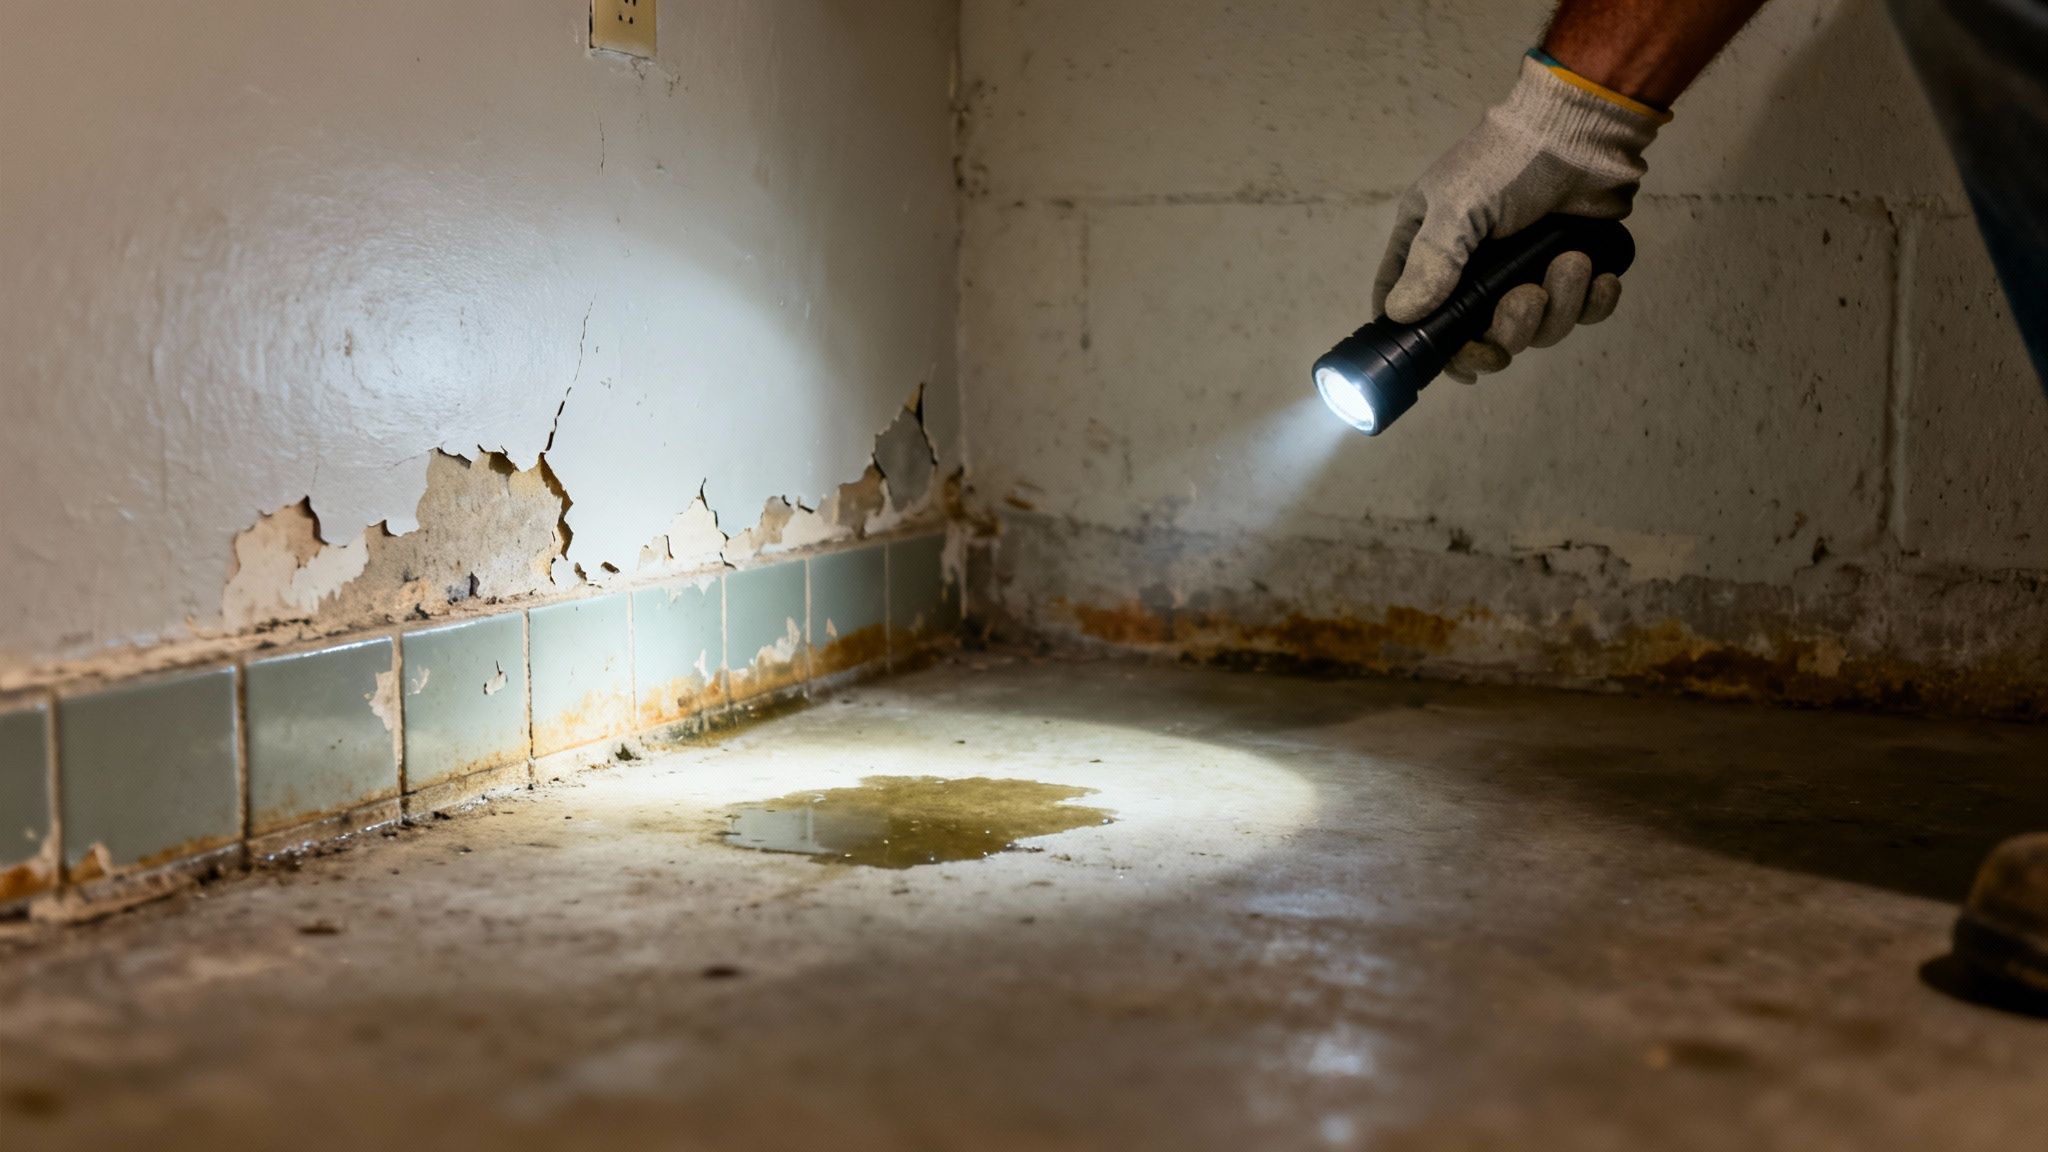
- Basements and Crawl Spaces: These areas are prime suspects. Look for water stains on the walls or floor, feel the concrete for dampness, and check for any condensation beading up on pipes. A musty smell in the basement can easily get pulled into your HVAC system and spread throughout the entire house.
- Kitchen: The cabinet under the sink is a classic hiding place for slow leaks from the garbage disposal or drain. It's also worth checking the drip pan under your fridge and the rubber seal around your dishwasher door.
If you have a persistent mildew odor, especially one that keeps coming back after you clean, it often points to a deeper issue. This is frequently a sign of hidden mold growth inside walls or under flooring, which can pose health risks and damage your home's structure.
Spotting the Subtle Clues
Sometimes the source isn't a big puddle but a more subtle sign of excess moisture. Learning to spot these little clues can help you find the problem before it turns into a major headache. The presence of that musty smell is often linked to hidden mold growth, which thrives in poorly ventilated or damp areas. To better protect your home, you can learn more about how to spot hidden mildew in your home.
Keep an eye out for these red flags:
- Peeling or Bubbling Paint: This is a classic sign that moisture is trapped in the wall right behind the paint.
- Warped Wood: If you notice baseboards or floorboards starting to buckle or warp, there's likely a leak nearby.
- Discolored Grout: Grout that has turned dark, orange, or pinkish in spots is being exposed to constant moisture.
- Condensation: Seeing moisture regularly build up on windows or pipes means the humidity in that area is way too high.
Once you’ve identified the true source of the mildew smell, you can move beyond just temporarily masking the odor. You’re setting yourself up to solve the problem for good, creating a much fresher—and healthier—home.
Rescuing Your Musty Clothes and Towels
We’ve all been there. You grab a supposedly clean towel from the linen closet, only to be hit with that unmistakable damp, musty funk. That smell is a dead giveaway that the last wash cycle didn't quite get the job done. Mildew spores have made a home deep within the fabric fibers, a common problem with thicker materials like towels and workout clothes.
Just tossing them back in for another round with regular detergent usually won't cut it. The secret is to bring in specific additives that actively kill the odor-causing bacteria and dissolve the residues locking in that smell. The good news? You probably already have the best tools for the job right in your pantry.
The Power of Vinegar and Baking Soda
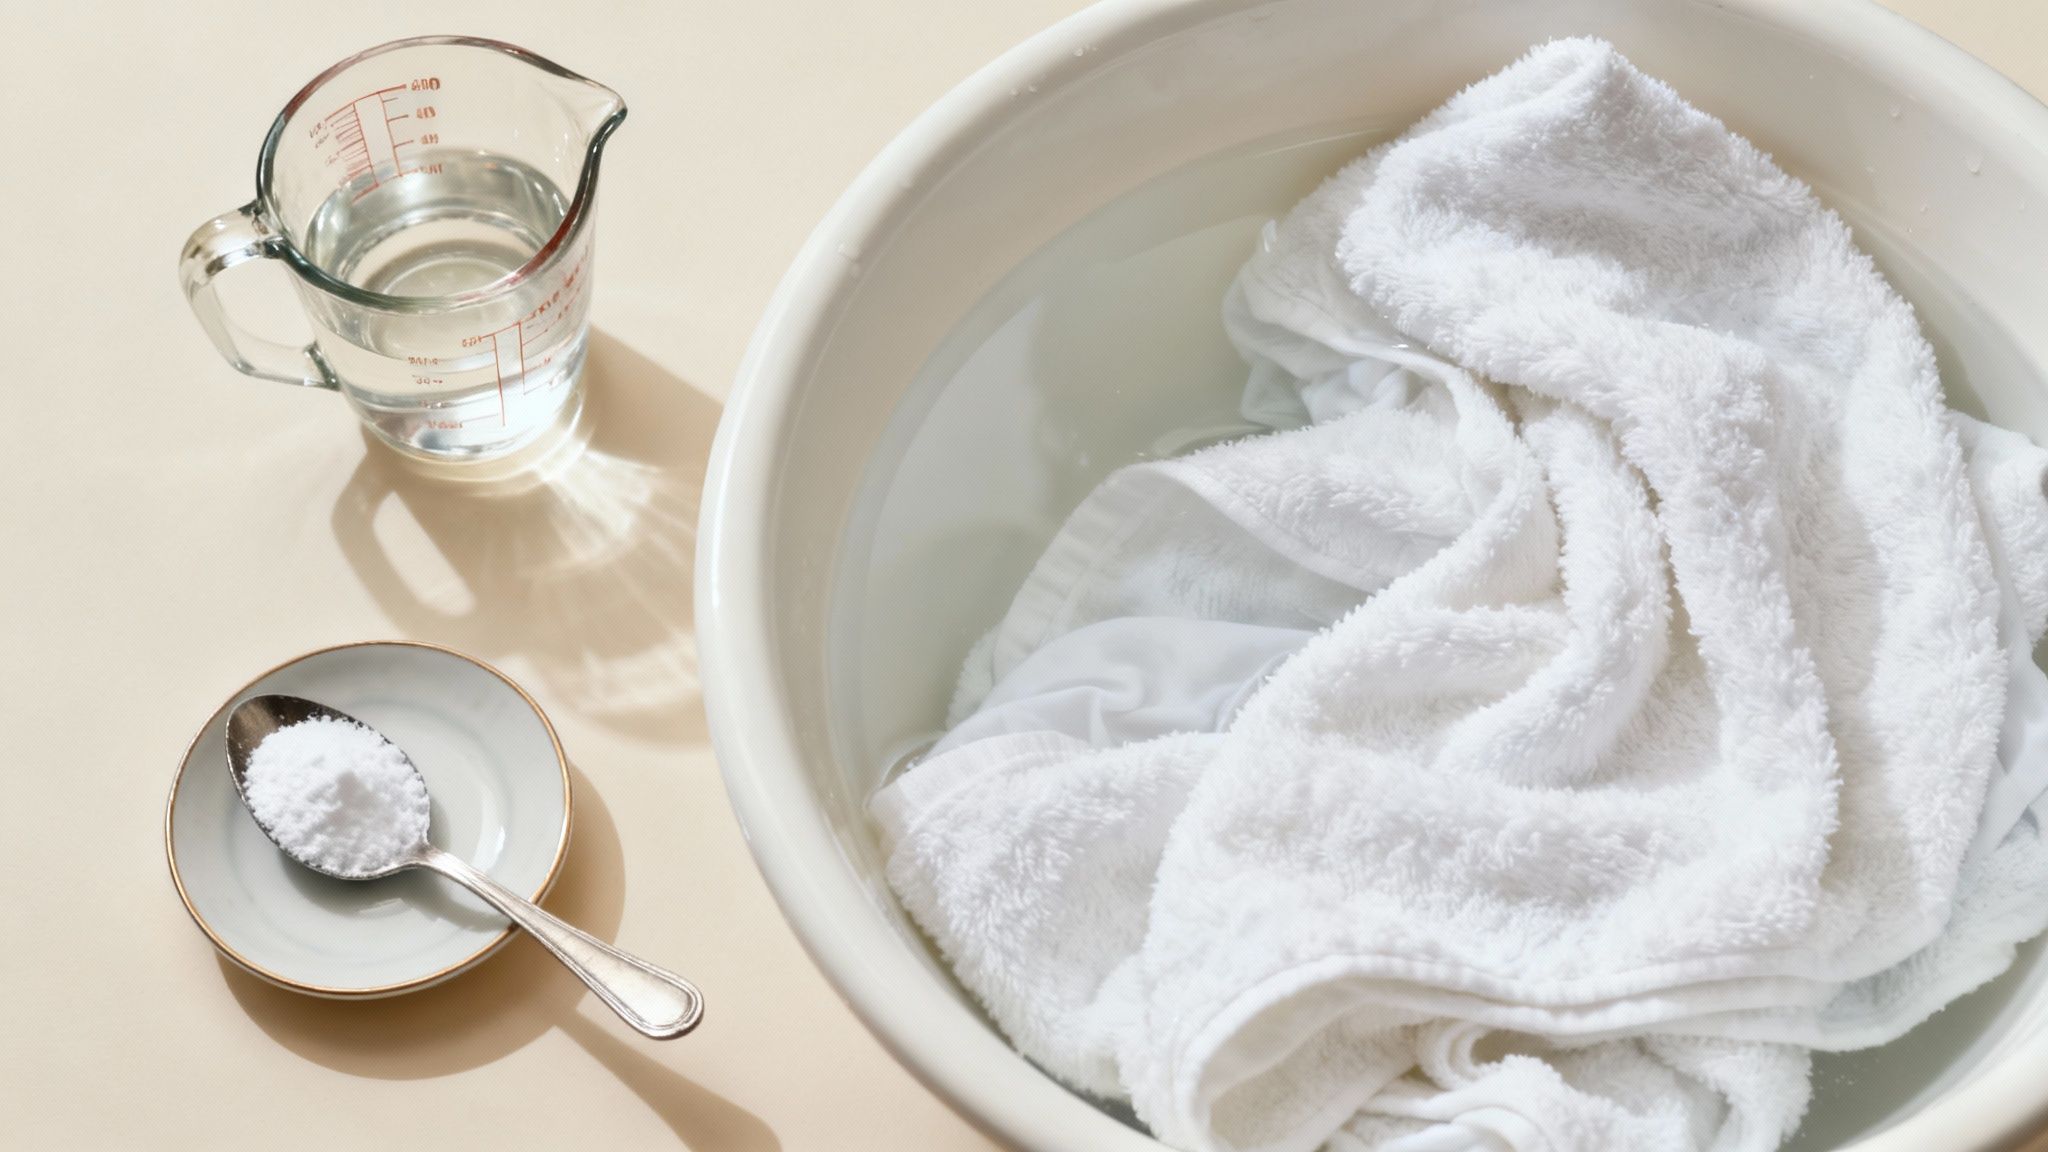
White vinegar is a laundry superhero. It’s a natural deodorizer and a mild disinfectant all in one. The acetic acid it contains is brilliant at breaking down the gunky buildup and oils that mildew loves to feed on, making it my go-to for any laundry rescue mission. Baking soda, its trusty sidekick, is alkaline and works by directly absorbing and neutralizing stubborn odors.
When you use them together—in the right order—they create a powerful one-two punch against mustiness.
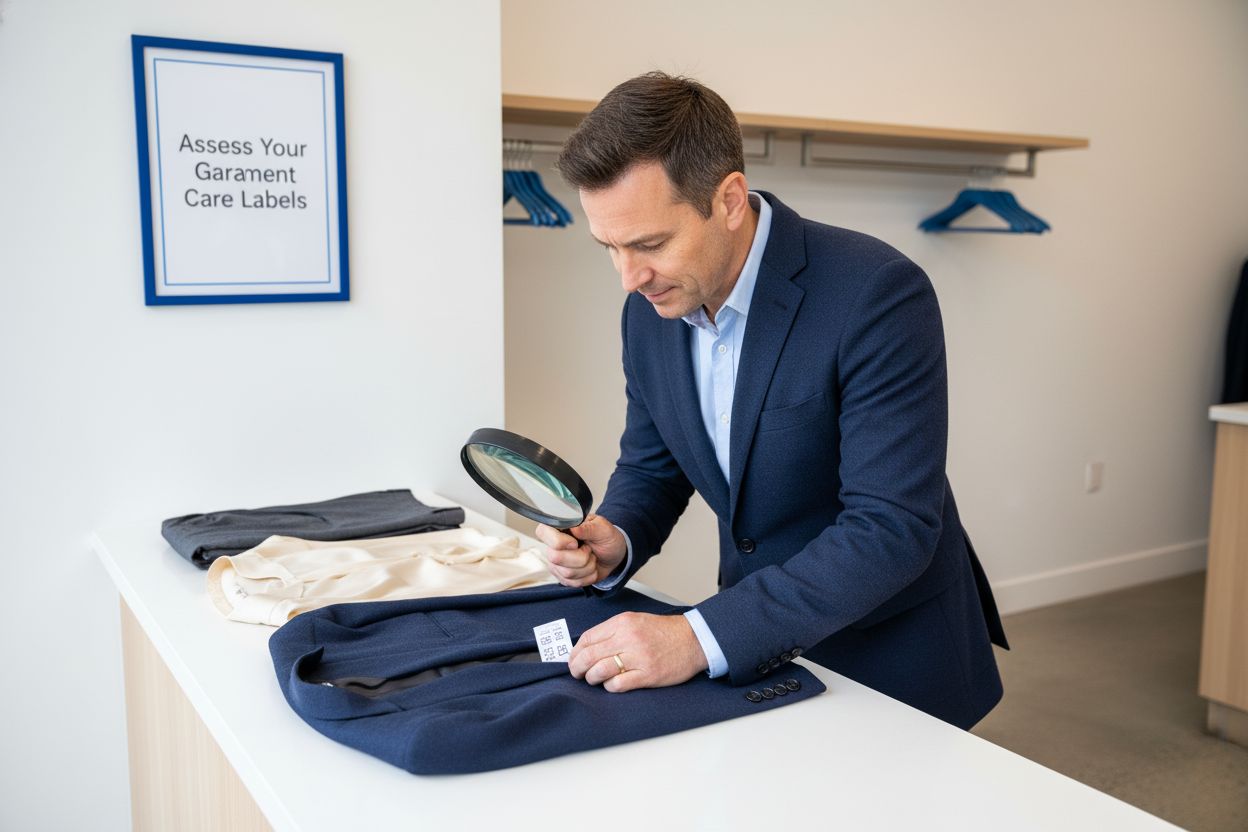
- The First Wash: Toss your musty items into the machine and add one cup of distilled white vinegar directly into the drum. Skip the detergent for this first round. Run a full cycle using the hottest water the fabric can safely handle (always check those care labels!).
- The Second Wash: After the vinegar cycle finishes, leave the clothes right where they are. Now, sprinkle in half a cup of baking soda, add your usual amount of laundry detergent, and run another complete wash, again with warm or hot water.
This double-wash method knocks out mildew smell in most cases. The vinegar goes on the offense, and the follow-up wash with baking soda neutralizes any leftover odors, including the vinegar smell itself.
Pro Tip: Whatever you do, never mix vinegar and bleach in the same load. The chemical reaction creates toxic chlorine gas, which is incredibly dangerous to breathe. If you need to use both, always run them in completely separate cycles.
Pre-Soaking for Seriously Stubborn Odors
For those towels or gym clothes with a smell that seems baked into the very threads, a pre-soak is your best strategy. This gives your cleaning agent of choice extra time to really penetrate the fibers and get to work long before the main wash even starts.
You can set up a pre-soak in a bathtub, a large bucket, or even a top-loading washer. Just fill it with water and pour in one cup of white vinegar for every gallon of water. Make sure the musty items are completely submerged and let them soak for at least an hour. For really tough cases, letting them soak overnight is even better. Afterward, just wring out the excess water and wash them like you normally would.
When it comes to getting rid of mildew, you have several options, from pantry staples to store-bought solutions. Choosing the right one depends on the fabric and how set-in the odor is.
Comparing Natural vs. Chemical Laundry Odor Removers
Here’s a quick look at some common solutions to help you decide what's best for your laundry load.
Ultimately, both natural and chemical removers can be effective. I always recommend starting with vinegar and baking soda since they're cheap, safe, and surprisingly powerful. For more persistent issues or specific fabrics, turning to products like borax or enzyme cleaners can provide that extra muscle you need.
When It's Time for Laundry Stripping
If your towels just don't feel absorbent anymore or your clothes still have a faint, funky odor after all your efforts, you might be dealing with buildup. Over time, detergent, fabric softener, and minerals from hard water can form an invisible film on your laundry, trapping bacteria and smells.
Laundry stripping is an intense deep-cleaning method designed to strip all that residue away. Our comprehensive guide on how to get mildew smell out of clothes dives even deeper into this process with extra tips.
This technique is best saved for durable items like towels, sheets, and sturdy cottons. I'd avoid trying this with your delicates, as the extremely hot water can cause damage.
- Start by filling a clean bathtub or a large basin with very hot water.
- Mix together 1/4 cup of borax, 1/4 cup of washing soda, and 1/2 cup of your regular laundry detergent.
- Pour the mixture into the hot water and stir it around until everything is fully dissolved.
- Submerge your clean (yes, they should already be washed!) laundry into the solution.
- Let everything soak for 4 to 6 hours, giving it a good stir every hour or so. Prepare to be shocked—and a little grossed out—by the color of the water.
- Finally, drain the murky water, wring the items out, and run them through a final rinse-only cycle in your washing machine (no detergent needed). Tumble dry, and you're done!
By getting to the root of the problem—whether with a simple vinegar wash or a full-on deep clean—you can truly bring your fabrics back to life and make sure every load comes out smelling genuinely, wonderfully fresh.
Deep Cleaning Your Washing Machine
Have you ever rescued your clothes from that musty smell, only for it to come right back after the next wash? If so, the problem probably isn't your laundry—it's your washing machine. These appliances are the perfect breeding ground for mildew. They're dark, damp, and often sealed shut, which traps moisture and creates a haven for those stinky bacteria.
Running clothes through a smelly machine is like trying to get clean in a dirty shower. You’re just transferring the funk back onto your supposedly fresh laundry. A good, regular deep clean is the only way to break the cycle and make sure your washer is a source of freshness, not frustration.
Tackling the Gasket and Dispensers
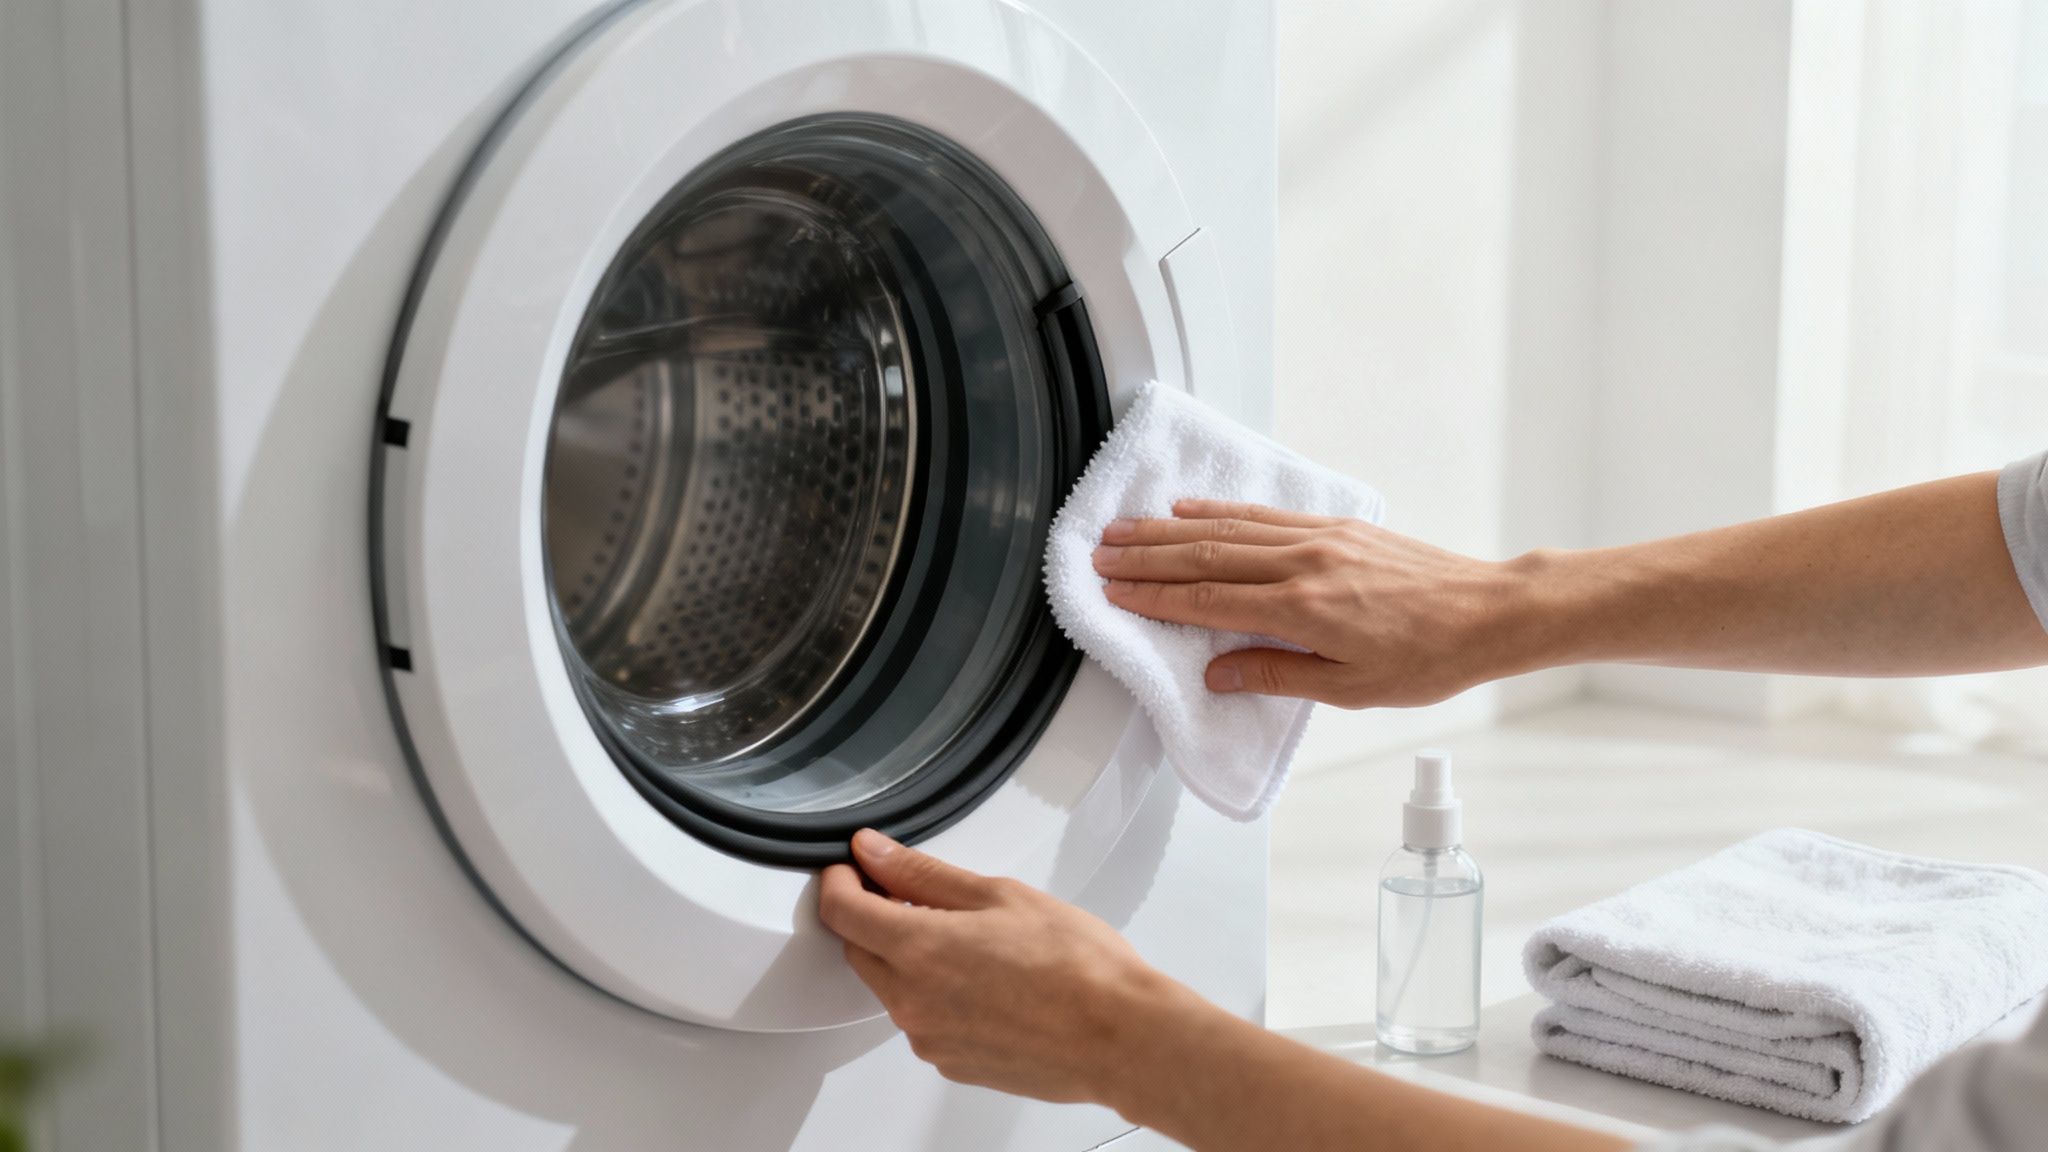
The number one offender, especially in front-loading machines, is that rubber door gasket. The seal has all these folds that are magnets for trapping water, lint, and detergent residue, creating a slimy, smelly biofilm.
Gently pull back the rubber seal and take a peek. You’ll probably be surprised by the amount of gunk hiding in there. Grab a rag, dip it in a 50/50 mix of white vinegar and water, and carefully wipe out every single crevice until it’s spotless. For any stubborn spots, an old toothbrush is your best friend.
Next up, the detergent dispenser drawer. This part is easy to forget but can harbor a serious amount of buildup.
- Remove the Drawer: Most dispensers pop right out if you press a small release tab.
- Soak and Scrub: Let the drawer and any inserts soak in hot, soapy water for about 15 minutes.
- Clean the Cavity: While it’s soaking, use your vinegar spray and a brush to scrub the inside of the dispenser slot. Get into all the corners where mold loves to hide.
Once the gasket and dispenser are sparkling, it's time to clean the heart of the machine.
Sanitizing the Drum and Internals
The drum is where all the action happens, but it also needs a hard reset to get rid of any lingering mildew spores. The idea is to run a maintenance cycle that cleans the parts you can't see, like the outer tub and hoses.
You've got a couple of great options for this sanitizing wash. You can use two cups of distilled white vinegar or a specialty washing machine cleaning tablet. Both work great, but a word of caution: never use them at the same time.
First, make sure the washer is completely empty. If you're using vinegar, pour it straight into the drum. If you’re using a cleaner tablet, just toss it in the drum or place it in the dispenser, following the product's directions.
Run the machine on its hottest and longest setting. Many newer washers have a dedicated "Clean Washer" or "Tub Clean" cycle—definitely use that if you have one. The combo of a powerful cleaning agent and scalding hot water is what really kills the mildew and flushes away all the gunk it feeds on.
If you're dealing with some next-level buildup, you might need to bring in the big guns. Borax is a powerful mineral salt that can seriously boost cleaning power. A deep-cleaning method like laundry stripping shows just how effective materials like borax are at eliminating tough residues. You can learn more about it in our guide on using borax for laundry stripping.
Creating a Monthly Maintenance Routine
Deep cleaning your washer isn't a one-and-done chore. It takes a little consistency to keep mildew from ever coming back. A simple monthly checklist can save you a world of smelly frustration later on.
This quick routine only takes a few minutes but makes a huge difference in preventing the need to get rid of mildew smell in the first place.
Your Simple Monthly Checklist
- Run a Hot Maintenance Cycle: Once a month, run an empty load on the hottest setting with either a cup of vinegar or a cleaning tablet.
- Wipe the Gasket and Door: After the last load of the day, do a quick wipe-down of the rubber seal and the inside of the door. Get rid of that excess moisture.
- Clean the Dispenser: Give the detergent drawer a quick rinse and wipe to stop gooey residue from building up.
- Leave the Door Ajar: This is the most important step! Always leave the washer door open between uses. This allows the drum to air out and dry completely. Trapped moisture is mildew’s best friend.
By making these simple habits part of your routine, you can turn your washing machine from a potential mildew factory into your most reliable partner for truly clean, fresh-smelling laundry, every single time.
Clearing Lingering Odors from Your Home

So, you’ve tackled the musty culprits in your laundry and even deep-cleaned the washing machine. But what do you do when you still catch a whiff of that stubborn, damp smell hanging in the air? This is when you realize the problem has gone beyond your fabrics and settled into the room itself.
Spraying a floral air freshener at this point is like putting a tiny bandage on a big problem. It might cover the scent for a few minutes, but it does absolutely nothing to fix what’s causing it. To truly kick that mildew smell out of a room for good, you have to stop masking the scent and start purifying the air.
This means getting serious about ventilation, humidity, and using natural solutions that actually absorb odors instead of just covering them up. The goal is simple: create a space where that musty smell simply can't survive.
Let the Fresh Air In
Your most powerful—and completely free—tool is good old-fashioned fresh air. Mildew thrives in stagnant, damp environments, so creating consistent airflow is your first line of defense. Stale air is a perfect trap for moisture, giving mildew exactly what it needs to flourish.
Just opening windows on opposite sides of the room for 15-30 minutes a day can create a cross-breeze that flushes out the musty air and dries up any lingering dampness. It’s a simple habit that makes a huge difference, especially in problem areas like basements or bathrooms. If cross-ventilation isn't an option, even a simple box fan pointed out a window will do the trick.
Ever wonder what that distinct "mildew smell" actually is? It's caused by microbial volatile organic compounds (MVOCs) released by growing mildew colonies. This is why just cleaning a surface isn't always enough; you have to get rid of the airborne compounds and the moisture that helps them multiply.
Control Your Home's Humidity
While airflow is a great start, it can't always win the battle against high humidity, especially in damp basements or muggy climates. This is where a dehumidifier becomes your secret weapon. Mildew growth kicks into high gear when the relative humidity in a room climbs above 60%. You can dig deeper into how humidity fuels these issues and find other mold facts on rainbowrestores.com.
A good dehumidifier helps you maintain an ideal humidity level, somewhere between 30% and 50%. This creates an environment that is actively hostile to mildew growth.
- Basements and Crawl Spaces: These spots are notorious for dampness. Running a dehumidifier consistently here can stop that classic basement smell from ever starting.
- Bathrooms: A small, portable dehumidifier is a game-changer in bathrooms with poor ventilation, pulling all that post-shower moisture right out of the air.
- Closets: In humid regions, closets can become musty hotspots. A compact, renewable dehumidifier can keep your clothes and linens smelling fresh.
By actively pulling water vapor from the air, a dehumidifier doesn't just help with the smell; it attacks the root cause, making it one of the most effective long-term solutions out there.
Use Natural Odor Absorbers
Once you've got the air moving and the humidity under control, you can bring in some natural odor absorbers to neutralize any scents that are still hanging around. Unlike air fresheners, these guys don't just add another smell to the mix—they actually trap and absorb the odor-causing molecules.
Baking soda and activated charcoal are two of the best and most affordable options. Their incredibly porous nature makes them perfect for literally pulling smells out of the air.
Where to Place Odor Absorbers for Best Results:
These natural solutions are fantastic because they're safe, cheap, and incredibly effective at passively cleaning the air over time. When you combine better airflow, controlled humidity, and the power of natural absorbers, you're not just getting rid of a bad smell—you're creating a fresher, healthier home where mildew won't be welcome back.
Preventing Mildew Smells from Coming Back
Getting that musty mildew smell out is a great start, but the real win is making sure it never comes back in the first place. This isn't about one-off deep cleaning sessions; it's about building simple, consistent habits that make your home an unwelcome place for mildew to grow. Think of it as a proactive strategy to keep your laundry and living spaces smelling fresh day in and day out.
You're essentially creating a defense system against moisture. By making a few small tweaks to your daily and weekly routines, you can shut down mildew’s favorite hiding spots and cut off its life supply: dampness.
Master Your Laundry Routine
The laundry room can be ground zero for musty odors, but a few smart habits can turn it from a problem area into a powerhouse of freshness. The main goal here is to cut down the time wet fabrics sit around and to make sure your machine has a chance to dry out completely.
Move Wet Clothes Immediately: Don't let a finished load of wet laundry sit in the washer. This is probably the single biggest cause of that funky smell on clothes. Make it a hard-and-fast rule to move everything to the dryer as soon as the cycle ends. If you can't get to it right away, at least crack the washer door open for some air.
Dry Everything Thoroughly: Dampness is the enemy. Before you even think about folding clothes and putting them away, check that they are 100% dry. Even a hint of moisture is enough for a musty smell to develop inside a closet or drawer.
Keep the Washer Door Open: Once you're done with laundry for the day, always leave the washing machine door ajar. It's a tiny step that makes a huge difference. This lets the drum and the rubber gasket air out, preventing the dark, damp conditions that mildew absolutely loves.
These small changes are incredibly powerful. They break the mildew life cycle right at the source, so you hopefully never have to battle that smell on your clothes again.
Smart Storage for Linens and Clothes
How you store your fabrics is just as important as how you wash them. A stuffy, poorly ventilated closet or a sealed plastic bin can turn fresh-smelling linens into a musty mess, especially with items you don't use very often.
Proper airflow is everything. Try not to cram your drawers and shelves completely full; this traps moisture and stops air from circulating. When you're packing away seasonal items, a little prep goes a long way. Our guide on the art of storing clothes properly has a ton of great techniques for long-term freshness.
Here's a trick I've used for years: tuck natural moisture absorbers into your storage spaces. Cedar blocks, little sachets of dried lavender, or even a small, open dish of baking soda can work wonders in a linen closet or dresser to keep things smelling clean.
Maintain a Dry Household Environment
Looking beyond the laundry room, keeping mildew at bay is really about managing moisture all over your home. It’s about being mindful of humidity levels and tackling problem areas before they have a chance to get smelly.
Bathrooms are prime real estate for mildew, thanks to all the steam and moisture. Always run the exhaust fan during a shower and for about 20-30 minutes afterward to pull all that damp air out. Regularly cleaning these spots is key, but for more stubborn issues, you might need to look into other strategies for dealing with bathroom mold and mildew to stop it from returning.
- Check for Leaks: Get in the habit of occasionally peeking under the sinks in your kitchen and bathrooms. Catching a slow drip early can save you from a massive mildew headache later on.
- Manage Indoor Humidity: Try to keep your home's humidity level somewhere between 30% and 50%. A dehumidifier is a great investment for naturally damp areas like basements or crawl spaces.
- Encourage Airflow: Good circulation is your friend. Open windows when the weather allows and use fans to keep stale, moist air from getting trapped in corners and closets.
By working these simple, proactive habits into your life, you'll shift from constantly fighting mildew smells to preventing them altogether. You’ll create a home environment that doesn't just smell fresher—it's healthier, too.
Your Questions About Mildew Smell Answered
Let's be honest, dealing with that musty, damp smell can bring up a lot of questions. Are we talking about mildew or mold? Why do my gym clothes always smell the worst? When is it time to stop scrubbing and just call for backup?
Getting clear on these points is the first step to reclaiming your home from that funky odor. We'll break down some of the most common things people wonder about when they need to get rid of mildew smell.
First things first, many of us use "mildew" and "mold" like they're the same thing, but there's a slight difference that actually matters for cleanup.
Think of mildew as mold in its early, less-aggressive stage. You'll usually spot it as a flat, powdery growth that’s gray or white. Mold, on the other hand, is the bigger, badder cousin—often fuzzy or even slimy, and it can show up in shades of green, black, or other colors. That usually signals a deeper, more stubborn problem.
Why Some Fabrics Smell Worse Than Others
Ever wonder why your synthetic workout leggings or those thick, fluffy bath towels seem to cling to that musty smell for dear life? It’s not in your head. The fabric's structure is the culprit.
- Synthetic Fabrics: Materials like polyester and spandex are basically plastic. They don't really absorb water. Instead, moisture, sweat, and body oils just sit right on the surface, creating a perfect little buffet for odor-causing bacteria.
- Thick, Absorbent Cottons: Your favorite plush towels and cozy sweatshirts have a really dense weave. That means they can hold onto moisture for a long time, giving mildew spores all the time they need to settle in and multiply deep within the fibers.
This is why lighter, more breathable fabrics like linen or thin cottons rarely have that problem—they dry out so much faster, stopping mildew before it can even get started. For a complete deep dive into eliminating persistent musty odors permanently, consult our comprehensive guide on How to Remove Mildew Smell for Good.
Knowing When to Call a Professional
Most of the time, you can tackle surface mildew with the DIY methods we’ve covered. But some situations are just too big or too risky to handle on your own. That’s when it’s time to bring in a professional.
If the musty smell is overwhelming and just won't go away, or if you find a patch of mold larger than a dinner plate (about 10 square feet), it's time to call in a professional remediation service.
Also, if you suspect the smell is coming from inside your HVAC system or if anyone in your home is having respiratory issues, don't wait. It's critical to get expert help right away. Professionals have the proper equipment and safety gear to get rid of large-scale mold problems safely and for good.
As more people understand how indoor air quality affects health, the demand for these services has shot up. Industry reports show that mold remediation is growing at a steady rate of over 10% annually, partly because of stricter building codes and people just being more health-conscious. Knowing when to hand the job over to the experts is key to making sure the problem is solved correctly, keeping your home a safe and healthy place to be.
Tired of the endless laundry cycle and stubborn odors? Columbia Pike Laundry is here to give you back your time and peace of mind. We offer professional wash & fold and dry cleaning services with convenient pickup and delivery. Let us handle the tough stuff so you can focus on what matters. Schedule your first pickup today at https://columbiapikelaundry.com and reclaim your weekend.
Popular Blog Articles


Meet the Author
Daniel Logan didn’t start CPL because he loved laundry. He started it because his family was drowning in time debt, and laundry was one of the biggest weights.
Mornings were chaos with two kids under 5. Evenings felt like catch-up. And weekends? Gone to sorting socks and folding piles.
He knew his story wasn’t unique. So he built a business that gave families like his just a little bit of breathing room one load at a time.
With no laundry experience but deep tech skills, Daniel rolled up his sleeves, doing every job himself while building systems that turned it into a modern laundry service that saves customers time, simplifies their lives, and delivers reliability they can count on.
That’s where CPL began. Not from a playbook, but from pain. From one dad trying to buy back time: for himself, and for every household like his.